The hot fudge for your visual flow sundae

Standard

Flows really are a ground breaking piece of technology.

were not worthy

It was evident last year at DF14 by how often there were talked about. More stuff is being added every release and there is a great big community of users!

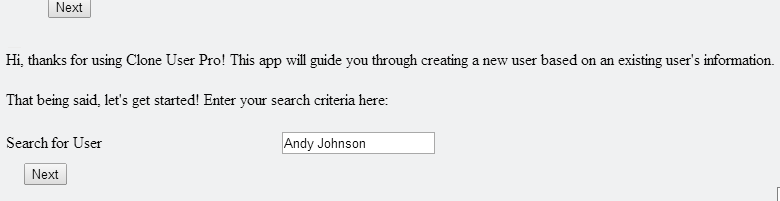
UI based flows are awesome for internal user, just pop the URL into a button and instant awesome! A question that is constantly being asked is, how do I get the pop up window to go away”

See, when you launch the UI version of the flow, it does it’s merry little thing and then takes you back to the start, which is not always ideal! Being that we are all really clever folks in this community, there are a bunch of ways around this, but a lot of them require visualforce / apex or a URL hack…but not many of them actually address the needs I had:

  • I need this to run with in a community
  • I would like the window to close once the flow is completed

First things first, we need the flow to run in a community. According to page 115 of the Visual Workflow Guide:

“Enable external users to run your flow by adding the flow to a Visualforce page and distributing that page through a Force.com site, Customer Portal, or Partner Portal.”

OK, no big deal there. This topic has been covered extensively on this blog and others! As a side note, this is how you get flows playing nicely with Salesforce1, so head over here to learn more…I will wait!

Ah, you are back! Now that we have a flow that will run on communities or internally. How the heck do we get the flow to close out the window? Well, after googling various iterations of “closing visualforce window” I finally just decided to google something like “close browser window javascript” (This was after googling “Moscow Mule Recipes”).

I wish this just came from one source, but I was really using the google hive mind that day! What I ended up doing is using some javascript in a visualforce page called “ForceClose”:

<apex:page showChat=”false” showHeader=”false” sidebar=”false” applyBodyTag=”false” applyHtmlTag=”false”>
<html>
<head>
<title>ESCAPE</title>
<script>
function closeWindow() {
window.open(”,’_parent’,”);
window.close();
}
</script>
</head>
<body onload=”closeWindow()”>

</body>
</html>
</apex:page>

NOTE! If this code looks familiar to someone, please let me know so I can give you a hat tip from little corner of the web!
NOTE + 1! I still have my #ClicksNotCode card, so I would imagine this is not near good code!

Now I have a flow that runs in a Visualforce page AND a Visualforce page that should (in theory) close itself. It is time to…wait, I wish this step could be more dramatic…maybe you could read this in a monster truck voice? Just in your head so you are not disturbing your neighbor! OK, carry on…join the two pages together! Just set your finish location on your flow visualforce page to be the forceclose page!Add Finish Location

And, that is that! So, how does it work? Well, pretty darn good! The super sweet thing though is that this is reusable! I now used the “ForceClose” page 5 or 6 times in various flows, and that is really nice!

As always, thanks for reading the SFDCinSEA blog! If you have any questions or comments, let me know!

Advertisement

Automagically create tasks from templates in Salesforce!

Standard

If you are like me, everyday upon waking up, you are craving coffee. This craving requires action and also requires a set number of steps that will repeated as long as this craving is happening (Hopefully, forever and ever). If I were to map this out, it might look like this:Tasks to Coffee

The act of me waking up will prompt a series of tasks, and this is something that is repeatable EVERY TIME.

Now, apply this to your users. How often will the user be DOING something that requires them to CREATE a task or series of tasks? Here are a few examples I could think of:

  • After closing a deal, follow up tasks are scheduled for 30 / 60 / 90 days out
  • After contacting a lead, follow up tasks are scheduled
  • After losing a deal, create a set up follow up tasks

The key to this exercise is identifying ACTIONS that will require a set of tasks to be created. This is the challenge that I decided to take on with my Salesforce BFF visual flow and my Salesforce Frenemy Process Builder. The idea was that when a case meets a certain criteria, a series of tasks will be created…and is this wasn’t challenging enough, I decided to kick it up a notch and design the functionality in such a way that the tasks are not hard coded but actually templatized.

Here are the ingredients to this functionality:

  • “templitized” tasks
  • A flow
  • A process (though, you could use a flow trigger as well)

At a high level, what will happen is that the flow is kicked off via the process (or trigger). The flow does a query of all tasks and ONLY pulls those that meet our templatized criteria. These are then used as templates for the creation of new tasks. The example below is how I built this out so that a series of tasks are created when I mark a case as “Ready for Coffee”.

Enough talking! Release the Screen Shots!

Release the Screen Shots

Step 1 – Create a “templatized” task

In this case, I note that the task is a template by placing a flag on the subject and setting the task status to completed. By setting the status to completed, you can keep the task from staying open and visible on the users home page. In the example I am building out, I am looking for a subject that ends with “!MakeMeCoffee”.

Task Template XLS

I am using the connector for this because…well…it works and I didn’t want to do it by hand!

Step 2 – Create your flow

The basics of the flow is that there is a fast look up to find your templatized tasks and put them into a Sobject Collection. This collection is then looped through with your regular loop de loop, which builds out the set of tasks that will be created. Be sure to build out a formula for the subject field that strips away the template flags,

Build Task Subject

else, well, you might end up with a lot of stuff!

Flow Magic

As usual, when I built out my flow, I built out one version that is driven off of the UI (pictured below). This way, I can do rapid testing without activating anything. After things are 90% happy, I will remove UI elements and save it as a new flow.

Step 3 – Create your process

Process builder is my frenemy…I see the potential, but am still really sore over loosing flow triggers. But, the cool thing is that we have folks out there in the Upper Echelons of Salesforce looking at our comments and reading our blogs and they are making changes and I am excited for where process builder is going! Soapbox aside, I created a process for case and set the criteria.

Criteria Logic - Process Builder

The ONLY thing this process is doing is calling the flow and passing over just enough information to run. In the past when I have used flow triggers, I tended to push over more information, but since process builder requires activate / clone / activate cycle if something goes ker-plewy (for the record, I did this cycle 7(!) times for this demo!), I have switched over to just pushing over the minimum as a variable.

OK, so the work is done, you are all set…Let’s see how this works!

Now, for the proof.

I have my case created, and I am going to check the box that signals that I would like some coffee.Ready...

As you can see, tasks are now created associated with the case.Go!

To emphasize again, the power of the template is that if I (as a user, not a system admin) wanted to change something about the tasks are created, I can do so on my own and not have to wait for a system admin. Another great benefit for the admin / developer is that nothing is hard coded except for template criteria…and even that could be made more dynamic to handle further scenarios.

Further mind blowing awesomeness is that this is NOT just for tasks on cases…it could be anywhere…or even applied to other objects!

Questions / Comments / Buy me a coffee?

Andrew

Why Process builder, Why? (Humble Pie Update!)

Standard

*** Guess what? This blog post is OUT OF DATE – See this new one for the updated, humble pie, “it’s not salesforce, it’s me” edition! ****

Loads of fun today. I used the process builder to set up some really cool stuff that otherwise would have required a pretty big flow or some apex.

Basically, when a case of a certain type is created, X amount of tasks will be created as well. All was right with the world, created, activated and tested…and then…the world stopped spinning.

Workflow Action Failed to Trigger Flow
The record couldn’t be saved because it failed to trigger a flow.
A flow trigger failed to execute the flow with version ID blah blah blah.
Contact your administrator for help.Click to return to the previous page.

Huh, that is weird…maybe the email message would shed some light on this.

No help here

Move along, no help here

Sigh…Good thing I have a GIF of Batman doing a facepalm!

Batman-Facepalm

After a couple cycles of “deactivate, modify, activate, test”, and more fails with that uber helpful message, I dug into google.

There, on page 9 of the Process Builder Guide, I found the ONE dang line that helped:

“• You can add up to 10 immediate actions and 10 scheduled actions to a given criteria node.”

So, that was the root of this #whysfdcadminsdrink moment…but you know what? That is kind of crazy. I was able to save and activate a process that WOULD NOT WORK AT ALL! You would think that there would be some kind of warning or something, but if you did think that YOU WOULD BE WRONG!

So please, fellow admins, join me in voting up this idea, where process builder would actually not let you save it with a condition that would cause it to fail.

https://success.salesforce.com/ideaView?id=08730000000DlNoAAK

2 cents on Salesforce Process Builder

Standard
Quarter

OK, maybe .25 cents worth!

I started playing around with Salesforce Process builder and I figured I would give the world my 2 cents on this new functionality!

The process builder is a HUGE step forward. It is really cool, especially considering this functionality is less than a year old. If you were amazed by what you can do with #ClicksNotCode before, this will be mind blowing.

3 things I like:

  • Up to 5 decision points. Raise your hands if you have ever had to dissect a HUGE workflow with multiple gnarly logic steps…OK, this one is for you all. Stop weeping, process builder is going to help tremendously. What I like is that you can have up to 5 conditions grouped under a process that run really as separate statements.
  • Run LOADS of Actions. There is NOTHING quite a fun has building out a super awesome workflow and then rebuilding the logic so you can run an approval process #sarcasm. One place for all this stuff now!

Only one not present Make me coffee

  • Great UI. I love Visio. Seriously, love it. The UI of process builder makes documentation a snap since you can just grab a screen shot and see in pictures what the heck is going on. You know what would make this better though? A Nice “Click here to Print” button that would print out the process along with all the “stuff” with it. Yes, I used “stuff” as a technical term.

3 things I don’t like:

  • Versions are a PAIN. To be fair, this is a beef I have with Flows as well. I should be able to deactivate, make changes and then reactivate. One of the MAGIC things with workflows is that you could make a change, save it, test it and be done. With Process Builder, you have to clone, enter a new name (WHY!), save then activate. If you find something goofy, guess what, same dang process. Much like flows, you very quickly generate a TON of versions.
pain

Speak it Grumpy Cat!

  • Can’t edit an inactive version. Yep, this is another versioning thing. One of the things I particularly like about flows is that I can step into a previous version, make edits and save it. Of course, there is a warning that I cannot over write the previous version, I have to save it as a new flow or new version of the flow. Sometimes, if your versions are different enough, you have to dig in and see what you could have done differently.
  • Replacing Precision Tools. You could create a flow trigger stupid fast. You could do it from multiple screens and you could edit it after you have associated it with a workflow. Here is a corny analogy. Let’s say that you noticed you have a screw loose on a piece of furniture. To tighten the screw, you would go and grab the cool screw driver with multiple bits out of your tool box and tighten the screw. This is like using a flow trigger. Just the minimum to get the job done! If you were to do this same action the process builder way, you would grab the WHOLE toolbox which includes tape measures, hammers, pliers, pencils etc…and bring it back to the furniture. Sure, the toolbox contains the screw driver and you are accomplishing the goal, but you just don’t have to lug that toolbox around.

So, that is that. Let me reiterate again…I love process builder and I think it is a  fantastic piece of tech, but don’t take away the precision tools because the tool box is getting fancier!

Cleaner Page Layouts using Flows and Formulas (1 of 3)

Standard

Back in the day, when I was just a transfer student at Everett Community College, “one week” was a hit single and I was a newbie coder taking visual basic.

(Your welcome for this ear worm)

During this class, we had a discussion on page layouts, that went a little something like this:

If you design a layout that has a bad tab order, and it reduces the speed of a transaction by one second, is it a big deal? Well, consider it this way: If your software is bought by a million people, and they can complete 500 transactions a day, your one second reduction of efficiency is costing the consumer 500000000 seconds per day…which is 8,333,333 minutes or 138,888 hours. If the average wage of those users is ten dollars an hour, your one second in efficiency now has cost 1.3million dollars per day.

Not even a Lego Calculator could make that discussion cool

With guilt trip thusly set to “argh”, I focused my efforts on UI design and making things work efficiently. Even now, I can remember the tab order of one of my first CRM’s I worked on…because it was out of order.

The stakes have changed since I was taking Visual Basic. I (we) support sales, and lost productivity is not simply about lost time, but about what your sales teams COULD have been doing. The math is pretty easy…and pretty scary:

Time spent clicking / scrolling / using salesforce in an inefficient manner

X by Number of times

X by Number of Users

X by days in year

= Time wasted = Money Lost = No free coffee

For the sake of this blog post, I am going to clean up the contact layout. I have sat with my users and estimated that they waste about 2 seconds every time they hit the layout  because of a section that Marketing has requested. This section consists of four check boxes, three text boxes and one URL field in a two column layout. This section was created for marketing and was placed near to the top of the layout in return for the data not being required. This section pushed a much more used section down below the scroll line (IE, users would have to scroll to see it). Marketing has given the OK on making this section not visible as long as there is some visual refernce to these fields still on the page layout.

A user will typically hit the contact layout 25 times per day and I have 25 users. If I can compact the layout, I should be able to reduce scroll time by about half, which should save about 45 (sales) hours per year. Notice, I didn’t just say hours, I said sales hours. Sure, saving 45 regular hours might not be much in the whole scheme of things, but sales hours is like a force multiplier. If you enabled your sales teams to have even a few more minutes per week, they can make a few more calls, make a few more emails, make a few more dollars.

Take a minute to enjoy this worn out cat.

Phew

I am beat just writing about this!

I am going to break this whole thing out into three distinct chunks:

1)      Create the Summarizing Formulas (In this blog)

2)      Create the Visual Prompts (Next Blog)

3)      Make Data Entry awesome with Flows (Next Next Blog)

Summarizing Formulas

Personally, I tend to write smaller, nested formulas that analyze bits and pieces of data. This makes it a bit easier (in my opinion) to write that final formula that presents the results to the user. While you could probably write this all in one huge formula, for the sake of troubleshooting and scalability, I am going to create the following fields:

1)      Create a formula to look at the 3 text fields (Return Type is Text)

Text(

if(len(Test_Text_1__c)>0,1,0)+

if(len(Test_Text_2__c)>0,1,0)+

if(len(Test_Text_3__c)>0,1,0))&” out of 3 populated; ”

Text Box Formula

2)      Create a formula to look at the URL field (Return Type is Text)

if(len(Test_URL__c)>0,”URL Present”,”URL Not Present”)

URL Formula

3)      Create a formula to look at the check box fields (Return Type is Text)

Text(

if(Example_Check_Box1__c=TRUE,1,0)+

if(Example_Check_Box_2__c=TRUE,1,0)+

if(Example_Check_Box_3__c=TRUE,1,0)+

if(Example_Check_Box_4__c=TRUE,1,0))&” out of 4 set to True; “Check Box Formula

4)      Create a formula to aggregate the above

Check_Example_CheckBox__c &” “& Check_Test_Text__c &” “& Check_Test_URL__cAggregate Formula

The net result is a field that will present the user with data facts not data entry points. Aside from having a cleaner layout, I a firm believer that if presented with text, most humans brains at least acknowlege that text before moving on. By reducing the clutter, you are making your overall page layout less fatiguing.

End Result

Individual Results

In the next post, I am going to discuss how we are going to visually prompt the user to give us data, but until then consider the other benefits of this type of functionality:

1) You could use these fields in reports to give better summaries

2) You could write validation rules off of these formulas rather than the individual fields

3) You could write workflows off of these formulas

See you all next week, same BatTime, same BatChannel where I will show you all how to kick it up a notch and grab your users attention!

Kick it up a notch

You totally thought I was doing Batman pic, weren’t you?

Andrew

Add followers with Flows

Standard

Chatter (in my opinion) is one of the really neat features of salesforce, allowing users to follow records that might be important to them is just one of the “Killer Apps” of this functionality. Ironically enough, being that this is a social network, is the request for that one can just add followers automagically if  “X” condition is met. There are even a couple apps on the appexchange for that.

Automated Networking, Jumbo Shrimp, Stop / Keep Moving, OxyMoron

Automated Networking, Jumbo Shrimp, Stop / Keep Moving, OxyMoron

To me, this takes a bit of the social out of “social networking”, so I am going to sketch out a solution that is a bit more personable but still makes it easy to add a follower

In a nutshell, it goes a little something like this:

1)      Within a record, the current user feels that another user (or themselves) should be on the follow list

2)      The current user clicks a button. In this case, I have called it “Pied Piper”

3)      A flow is launched that does the following:

1. Looks up a user based information given

2.Attaches that user to the current record as a follower

As usual, I am just sketching going to provide the foundation for this functionality. The magic here is that you can flows to do some neat stuff like attaching multiple users, adding comments, tags, etc. You don’t have to add this stuff in, but I would encourage playing around with it to see what you can / can’t do. Also, a quick Caveat. I found that a user will have to have “Modify All” permissions on the object you are pushing this out to. 

That aside, now we get to the Nuts & Bolts of the matter. I have got a couple of components that I am going to be using:

  1. A visual flow
  2. A custom button driven by a URL
  3. A nice cup of Coffee (Optional, or not)

This flow function sounds exciting and awesome (Follower Updates, Magic!), but is really basic. There are four components to this flow, Entry screen, Record lookup, Record Create and the confirmation screen (optional). There is however a critical variable, varAccountID. This is the variable that houses the ID that is passed over via URL. Just be aware when you are building this out!

The Components

Salesforce Flows, How awesome

On the entry screen, there is a text box for entry of a person’s name. The text box value is passed to the Record Lookup. One of the easiest improvements would be making this multi search (name, ID, email), just something to keep in mind.

Search Box

The flow does a look up on name, and returns the userID.

2014-05-13 13_15_27-Flow Designer_ public_FlowFromFlow


Next up is the Record Create on the object Entity Subscription. In this case, the parentID is the accountID, but it can be anything. SubscriberID is just the UserId pulled above.

2014-05-13 12_49_55-Flow Designer_ public_FlowFromFlow

Once the record is created, there is a confirmation screen. This is an optional step, but something I like to do.

Confirmation

Now that I have a flow in place, I create a button (Pied Piper) on the account layout.

Pied Piper Button

1 story point was spent on the clever name

This button is nothing fancy, just running a hyperlink that will open up the flow AND push over the accountID of the record the user is currently in. I did add the retURL on the end so that instead of a loop, the user is returned to the accounts page.

Behind the Curtain

Just to reiterate, this is the foundational work. You could implement this into production and have something that works but it isn’t going to be awesome. Here are the required proof shots!


As always, questions or comments, hit me up!


andrew

Delegation Made Awesome (Salesforce1Selfie Number2)

Standard

With my first salesforce1 selfie I took on user setup and reduced my “Click Load” when it comes to setting up users.

For this salesforcesforce1selfie, I am taking a swipe at the delegate process.

The org I support has quite a few approval processes and within these processes are a mix of related user (manager, for example) and named user approvals. Supporting these processes can be quite a challenge, especially around summer time since we are not using the delegate functionality. We have tried to roll out delegates, but never quite get off the ground with adoption. After taking a close look at the delegate function, reviewing notes from our last attempt and talking to the SFDC_IT team member I believe the lack of adoption is due to:

1)      No obvious click path to delegated approver screen (Click on Name, Click on Drop Down, Select “My Setttings”, Click on “Approver Settings”, enter delegate )

2)      Unable to start / stop time delegates

3)     Can’t turn on via mobile

4)     Too much mail if the Delegate is left “on” (See #2)

I believe that if I can add functionality that will help with the above, I can increase adoption of delegates. At the very least, like my clone user app, I can use it myself during the summer holiday season!

Hold on tight, here we go!

images

We got a long way to go and a short time to get there!

First things first, I needed to create an input method for my users that could be both easy to use and upfront. Therefore, I built out a custom object / tab combination, which I named “Out of Office”.

Out of Office

Can’t miss that!

I have as few entry fields as possible, both to speed the time to release but to also make it as easy as possible for the user:

1)      Start Time – Defaulted to current date

2)      End Time – User selectable date fieldThree Fields, one defaults

3)      Delegated Approver – Lookup field to user table

*Now, you might be reading this and shouting / typing furiously/ muttering about missed opportunities. I agree with you, and I feel certain that future revisions will get new / better functionality (Filtered Lookups, Approvals, On behalf of…etc), but this is about a good foundation to build on.

A quick look at workflows and I can see that I will have to do this with a combination of workflows and flows since I cannot update the Delegated Approver field with workflows, and

Narf

You know what I am talking about

In the interest of time, I am going to give an outline of the methods used to get this functionality up and running rather than the step by step.

Step 1, FUNctions used to update the delegate:

Workflow “OOTO Created” is triggered up on record creation. This workflow has two immediate actions, an email alert to both the delegate and the record owner and a flow trigger that runs a flow in the background that handles the actual update to the delegate. The flow really is basic, just a record update. I threw in a lookup out of habit.

2014-04-29 07_56_00-Presentation1.pptx - PowerPoint

The workflow also has a timed based action, which is the secret sauce. This time based action is based on “return date” – 0 and ticks the box “Back in Office”. Do not overlook the re-evaluate workflow rules after field change check box!

2014-04-30 08_30_30-Field Update_ Mark as returned ~ salesforce.com - Unlimited Edition

Step 2, FUNctions used to remove the delegate

Workflow “Remove Delegate” is ran when the field “Back in Office” is set to TRUE. This worklow has two elements (as I wrote it), but could get away with one. The main element is the flow trigger. This trigger launches another basic trigger that just deletes out the delegate from the record owner. The only thing special I did on this was to put in an extra field update in the flow so I can tell if it ran. I have a similar field update in my workflow. I found these to be very helpful when testing because I could visually observe how my updates were working.

2014-04-30 08_42_16-Workflow Rule_ Remove Delegate ~ salesforce.com - Unlimited Edition

Move along, nothing to see here

Now, for the brass tacks, how does it work? Well, it works pretty dang good. I have been monkeying around with this for a couple weeks now and I can attest to the basic functionality. The only real weak link in the process is that I cannot directly influence the field “Receive Approval Request Emails” setting via the flows. That, however, can be handled with business process.

2014-04-30 08_45_27-User Edit_ Andy Johnson ~ salesforce.com - Unlimited Edition

Curse You!

Now, for the 10,000 dollar question. How does it look on Mobile? Well my friends, it looks pretty darn good. Salesforce1 does such a nice job of packaging up the objects created that you get a very nice experience out of the box. This is such a nice contrast to previous mobile versions. I can focus now on making the user experience that much better.

2014-04-29 07_56_56-Presentation1.pptx - PowerPoint

Yeah, that is awesome

For example, I built out a field that shows a message based on a couple parameters: “if(Back_in_Office__c =FALSE,”Out of Office, returning “& text(Return_Date__c) ,”In Office”)”

I added this field to a new compact layout, and viola, the user can now, at a glance, see if they are in office or out of office, and if they are out of office, when they are coming back (NEVER!)

In OFfice

Awwww

Out of Office

Woo Hoo!


So there you have it, another piece of adminsitrivia solved with Salesforce, Visual Flows, and Salesforce1


Andrew


More information about my #Salesforce1Selfie

Standard

Salesforce.com is running a twitter contest asking for selfies of Salesforce1 Apps. The majority of posts Salesforce is receiving are user-centric and I think that is great, but just not the way I am going (for now). I built an app for the Administrator. More specifically, I built one for myself. The reason is pretty simple, during my day I get to do a bunch of different things and most are pretty fun. However, setting up new user is not on that list. This is because there are two typical scenarios:

1)      “Hi SFDC Team, please set me up in Salesforce with permissions like my colleague”

2)      “Hi SFDC Team, please set me up in Salesforce” Both of these scenarios can get messy fast…and by messy I mean way too many clicks. I did a quick sketch in Visio and found that at a very high level, there are 7 steps involved in the first scenario. That is way too much (In my opinion) for me to do a couple times a week.

TOO MANY STEPS

More fun than…checks list…not much

Therefore, I decided to make something that will reduce the number of steps AND let me easily share out the process AND can be done via the mobile AND be my entry in the #Salesforce1Selfie contest that hopefully will ensure I can stay somewhere awesome during Dreamforce 14.

2014-04-21 21_09_33-Fitzgerald Hotel - Google Maps

The Fitzgerald…not a bad place, but if I win I won’t be staying there.

There are three basic ingredients to my selfie, which I will go into more detail on in three carriage returns: 1)      Flow

2)      VisualForce Page (Don’t Panic!)

3)      Navigation

The flow starts with the basics “Input, Query, and Output” structure. My input is the name / email / id of the clone source. You can search three different ways from just one text box (More on that here, “One (flow) field to rule them all”). The query returns all the information you need to create the user record, which I had found previously while working creating users with the Excel Connector.

Pulled from Clone Source

Set it and Forget it!

I display that information on the confirm screen, which is where the cloned user email / name is entered. The finish button creates the user.

Create User Fields

And this is why I automate this stuff.

There is one interesting thing I need to call out here. If you were to create the user through the regular method, alias is autogenerated. Not a big deal except that Alias is limited to only 8 digits. I just default it to “NewUser” and will direct the new user to change it. You could do something fancy with workflows if you want. At this point, I have a flow that is crazy handy for use just with in the UI. I do plan on modifying this before I push to production so that the clone user search screen is skipped when launched via custom link on the user page. But what about mobile?

But will it load salesforce 1

“Where is the salesforce1 App?”

I had decided that I wanted to use flows as an app rather than an action. The reasoning is that while in the webUI I am more than likely going to be launching the flow from a user I have found, but if I am accessing via salesforce1, I will be providing the search criteria myself. Therefore, I need to make an app. To use a flow with in an app or even a page is going to require just a little tiny bit of code. It is such a small amount, I don’t even have to give up my hashtag #ClicksNotCode for this blog posting. There is some official documentation out there that will talk about embedding flows within a visual force page. It is really good stuff and I highly recommend you reading it. I have used both the official method and also just used an iframe. Either way seems to work out just fine. You need to make sure to check the box “Available for Salesforce mobile apps”.

iframe visual force

Don’t take away my Clicks Not Code Card!

One thing you might notice is that your performance on the mobile device is not the same as in the simulator. I believe this is because the basic iframe / interview code given is making the device work hard to format the flow page. I consulted with Google and found a write up on panya.com that had a couple things I wanted to try. I was able to see a HUGE improvement in load times by putting in a few extra lines of code. Another tip is to just save this code somewhere and use it as your template.

FASTER!

I am giving it all she got’s captn!

“<apex:page showheader=”false” standardStylesheets=”false”> <html> <Head> <Meta name=”viewport” content=”width=device-width, initial-scale=1″/> </head> <body> <flow:interview name=”Clone_User”/> </body> </html> </apex:page>“ Now that I have my flow and my tab I am nearly ready to roll. I just need to add it to the Salesforce1 navigation. You can find the nitty – gritty here, but it is just as easy as going to Mobile Administration and Mobile Navigation. NOTE! If you do not see your VisualForce tab here, got back and verify that you checked the box “Available for Salesforce Mobile Apps”. Also, I have noticed along with some other caveats, visual force pages that were created before salesforce1 came out are only checked with the Salesforce Touch option. It looks like they cannot be modified to run with in Salesforce1. The punch list is complete at this point. To verify you can use the Salesforce1 simulator (<<Org>>.salesforce.com/one/one.app) or you can also see the results on your mobile device pretty easily by just logging in to your sandbox environment.

flow GO

Step One

Confim screen

Step 2

I really like how this turned out. In a very small amount of time, I was able to: 1)      reduce the amount of clicks in my current process by about 80% 2)      Create a nice URL based process 3)      Create a mobile app for admin use “on the go”   As always, let me know if you have any questions, comments, concerns or interesting ideas you would like me to research!   andrew