Attaching a copy of an email alert in Salesforce

Standard

How long has it been? A long freaking time!
Long timeBetween summer vacations, coaching soccer and cub scouts, there has not been much idle time for this boy to blog, which stinks because there has been so much fun stuff figured out!

But, here I am, eating a turkey sammich, listing to some EDM on Slacker Radio and trying to get a blog post cranked out for you all.

What I am going to blog about is an annoyance that has been going on for quite some time… the issue of workflow email alerts. In fact, this idea is over 5 years old!

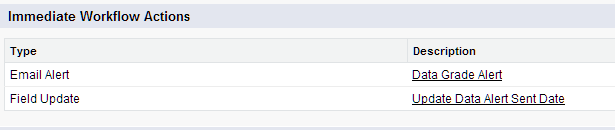
See, when you build out an email alert and it fires…well…it just fires. You can do a work around that involves carbon copys to an email to salesforce box or creating activities, but those workarounds are either not scaleable or they don’t give you much more information than “this email was sent!”.

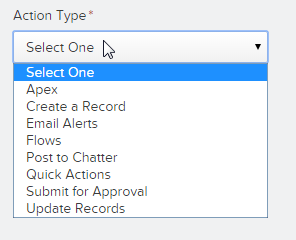
But, I did find a work around that is scalable using my favoritest thing ever, flows*. Now, did you see that little thing there? That Asterix? Yep, that is there for a reason. It is there because I wrote this out using flow triggers. I am sure you can do this with process builder, but I am just documenting the flow trigger function here. I like process builder, but in this case, I just need to crank something out quick, so I am using triggers.

The “Too Long; didn’t read” version is this. I created a flow that runs via the workflow (remember, I am using flow triggers!). When that flow trigger runs, it will do two things. It will send off the email alert AND create an emailmessage record. Yeppers, I said create an emailmessage. What I have found is that within salesforce you can create an email record through a flow and it will happily sit there. The trick is that you will need to pass the record ID from where you are starting and use that ID for the “parent ID” field on the emailmessage record.

This is a good jumping off point if you want to venture forth and tinker around yourself. For those of you that want more details, here ya go!

My assumptions at this point are that you are comfortable creating your own method of running this flow. As long as you can pass variables over from the record, you should be good to go. This flow only has two elements. The email alert (which is already built) and the record create for the email message. There are a bunch of things you can build out when you create the email message, but I am just going to cover the basics.

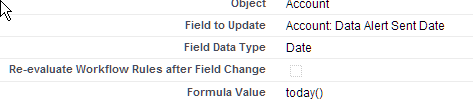
  • Parent ID – this should be the record you want this emailmessage living under. In my case, it was, well, case.
  • Status – Status is a funny one. It is displayed in plain English but the value is actually numeric. In my case, I am recording a copy of a sent email, so I used a status of 3, which is “sent”.
  • EmailMessageBody – An interesting thing about this method is how the text is displayed. You will actually be creating the emailmessage.body by using the field “HTMLbody” and to make it so the text looks nice, you will need to do the following:
  • Create a text template called “LineBreak”. This text template will just have the HTML value for break “<BR>”

Line break

  • Create a text template called “Email body”. Enter your data and insert the text template “linebreak” wherever there should be a line break. If you need to get values from the parent record, insert them here. I choose to pass them all over via the flow trigger, but you could just as easily do it with a requrery.

Linebreak being used

The end result is that the emailmessage you created via the flow will have a similar look / feel to the email that was sent out via the alert. Actually, it will look way more like the Text version, but really the point is to have this copy not so much to look pretty.

As I said before, I will leave the method of running this flow up to you, so let’s talk about the results.

By doing this, I was able to get a copy of the alert email attached to the parent. I was then able to remove the activity creation on the workflow since that was how we were noting that an email was sent out. The email copy is an actual copy, so we know what was sent out, which you couldn’t do through the activity. As an added benefit, running this via the flow allowed me to do some extra shenanigans that you really cannot do through a workflow, like running queries on other objects and adding them to the email.

The last benefit is crazy obvious, this is a LOW maintenance function. If a new value is added to the email alert, I (or another admin) just needs to add it to the record creation function…no dev time needed!

As always, let me know if there are questions / comments


andrew


Advertisement

2 cents on Salesforce Process Builder

Standard
Quarter

OK, maybe .25 cents worth!

I started playing around with Salesforce Process builder and I figured I would give the world my 2 cents on this new functionality!

The process builder is a HUGE step forward. It is really cool, especially considering this functionality is less than a year old. If you were amazed by what you can do with #ClicksNotCode before, this will be mind blowing.

3 things I like:

  • Up to 5 decision points. Raise your hands if you have ever had to dissect a HUGE workflow with multiple gnarly logic steps…OK, this one is for you all. Stop weeping, process builder is going to help tremendously. What I like is that you can have up to 5 conditions grouped under a process that run really as separate statements.
  • Run LOADS of Actions. There is NOTHING quite a fun has building out a super awesome workflow and then rebuilding the logic so you can run an approval process #sarcasm. One place for all this stuff now!

Only one not present Make me coffee

  • Great UI. I love Visio. Seriously, love it. The UI of process builder makes documentation a snap since you can just grab a screen shot and see in pictures what the heck is going on. You know what would make this better though? A Nice “Click here to Print” button that would print out the process along with all the “stuff” with it. Yes, I used “stuff” as a technical term.

3 things I don’t like:

  • Versions are a PAIN. To be fair, this is a beef I have with Flows as well. I should be able to deactivate, make changes and then reactivate. One of the MAGIC things with workflows is that you could make a change, save it, test it and be done. With Process Builder, you have to clone, enter a new name (WHY!), save then activate. If you find something goofy, guess what, same dang process. Much like flows, you very quickly generate a TON of versions.
pain

Speak it Grumpy Cat!

  • Can’t edit an inactive version. Yep, this is another versioning thing. One of the things I particularly like about flows is that I can step into a previous version, make edits and save it. Of course, there is a warning that I cannot over write the previous version, I have to save it as a new flow or new version of the flow. Sometimes, if your versions are different enough, you have to dig in and see what you could have done differently.
  • Replacing Precision Tools. You could create a flow trigger stupid fast. You could do it from multiple screens and you could edit it after you have associated it with a workflow. Here is a corny analogy. Let’s say that you noticed you have a screw loose on a piece of furniture. To tighten the screw, you would go and grab the cool screw driver with multiple bits out of your tool box and tighten the screw. This is like using a flow trigger. Just the minimum to get the job done! If you were to do this same action the process builder way, you would grab the WHOLE toolbox which includes tape measures, hammers, pliers, pencils etc…and bring it back to the furniture. Sure, the toolbox contains the screw driver and you are accomplishing the goal, but you just don’t have to lug that toolbox around.

So, that is that. Let me reiterate again…I love process builder and I think it is a  fantastic piece of tech, but don’t take away the precision tools because the tool box is getting fancier!

Reducing the amount of email while sending email

Standard

In my post titled “Cleaning the data that matters – and not all data matters” I finished the post up with the following:

“PS – For bonus points, create a nice email alert telling the reps their data is bad, and make it so it sends them that notice every time they edit the account OR opportunity…just put on a timer so it only sends once per day!”

To which, JaneIsaac replied:

“nice detective work. Could you share What the timer formula look like?”

Well JaneIsaac, this post if for you!

Not that type of request

I take requests…just not freebird!

The scenariois that we wanted to send out alerts if an account scored low data grade points and that account OR an opportunity related to that account was updated. After some quick research I saw that the updates were clustered, often receiving multiple updates in a short period of time. I didn’t want the alerts constantly kicking out.

So I built out a function so that prevent multiple alerts from being sent out in a given set of time. My functionality treats account and opportunity updates as two different actions, so I broke them out on this blog as such. Listing out the ingredients below and I will dissect the basic functionality after.

Must be about snack time...

Ingredients for tasty food, not tasty Workflows

For the Account alerts:

1 – Date field on Account “Data Alert Sent Date”

1 – Workflow rule for the Account Object “Data Grade Alert”:

Evaluation Criteria = “Evaluate the rule when a record is created, and any time it’s edited to subsequently meet criteria”

Rule Criteria =

Account WorkFlow Criteria

AND(
AND(Account_Data_Grade__c <>”Acceptable”,Account_Data_Grade__c <>”Excellent”),
Open_Pipeline__c < 1,
AND(LastModifiedBy.ProfileId <>” xxxxxxxxxxxxxxx “,LastModifiedBy.ProfileId <>” xxxxxxxxxxxxxxx “,LastModifiedBy.ProfileId <>” xxxxxxxxxxxxxxx “, LastModifiedBy.ProfileId <>”xxxxxxxxxxxxxxx”),
(DATEVALUE(CreatedDate)<>Today()),
OR(ISBLANK(Data_Alert_Sent_Date__c),(Data_Alert_Sent_Date__c) <> today()))

2 – Immediate Workflow Actions

All about that (Account Workflow) action Boss

1 – Workflow email alert Sendemail to “Last Modified By”

Account Workflow Alert

       1 – Field Update “Data Alert Sent Date” with Today()

Account Field Update

 For the Opportunity alerts:

1 – Date field on Opportunity “Data Alert Sent Date”

1 – Workflow rule for the Opportunity Object “Data Grade Alert”:

Evaluation Criteria = “Evaluate the rule when a record is created, and any time it’s edited to subsequently meet criteria”

Rule Criteria =

Opportunity Workflow Criteria

AND(
AND(Account.Account_Data_Grade__c <>”Acceptable”,Account.Account_Data_Grade__c <>”Excellent”),
AND(LastModifiedBy.ProfileId <>” xxxxxxxxxxxxxxx “,LastModifiedBy.ProfileId <>” xxxxxxxxxxxxxxx “,LastModifiedBy.ProfileId <>” xxxxxxxxxxxxxxx “, LastModifiedBy.ProfileId <>” xxxxxxxxxxxxxxx “),
Record_Type__c =”Open Opportunity”,
(DATEVALUE( Account.CreatedDate )<>Today()),
or(ISBLANK( Data_Alert_Sent_Date__c ), (Data_Alert_Sent_Date__c)<>TODAY()))

2 – Immediate Workflow Actions

All about that (Opportunity Workflow) action Boss

1 – Workflow email alert Send email to “Last Modified By”

Opportunity Email Alert

          1 – Field Update = “Data Alert Sent Date” with Today()

Opportunity Field Update

Taking a look at the mechanics:

I wish my cube was this cool...or that I had a flying monkey!

I wish my cube was this cool…or that I had a flying monkey!

The rule criteria’s are similar enough that we won’t have to dissect them both and since the interest is in the timer components, that is what I am going to focus on:

1)      (DATEVALUE( Account.CreatedDate )<>Today()) –  Ignore if the account is newly created

2)      But, the following situations are OK:

  1. (ISBLANK( Data_Alert_Sent_Date__c ) – The data alert sent date is Null (Never triggered before)
  2. (Data_Alert_Sent_Date__c)<>TODAY() – The data alert sent date does not equal Today()

This last line is what ensures that an alert will only send once per day. If the rule runs, (Data Quality = Poor and “Data Alert Sent Date” <>Today()), then the email alert gets sent out and the “Data Alert Sent Date” gets updated with the current day. If that record was updated ANY OTHER TIME during that day, the rule will not fire. I know I say this all the time, but what I really (Really) like about salesforce is that when it comes down to it, you can do some crazy cool stuff with zero code.

Clicks Not Code!

In other CRM’s, the above functionality takes 6 weeks and 2 developers.


Looking at this functionality now, I think a couple neat additions would have been:

1)      A rollup summary on opportunity.Data_Alert_Sent_Date__c (MAX), this way, you could have the account rule also looking at the last time an alert was sent out on ANY opportunity.

2)      A counter field update on the opportunity rule with a corresponding rollup on accounts. This would allow for reporting on ignored updates and thresh holding of the alerts.

But, the fun with Salesforce is the ability to rapidly prototype and tinker, so if I wanted to add in some new stuff, it is easy – peasy – lemon squeezy.

Well, hope you enjoyed this. I certainly had fun taking a look at something that was built out quite some time ago but continues to keep ticking! If there are any special requests, just let me know!

Cleaner Page Layouts using Flows and Formulas (1 of 3)

Standard

Back in the day, when I was just a transfer student at Everett Community College, “one week” was a hit single and I was a newbie coder taking visual basic.

(Your welcome for this ear worm)

During this class, we had a discussion on page layouts, that went a little something like this:

If you design a layout that has a bad tab order, and it reduces the speed of a transaction by one second, is it a big deal? Well, consider it this way: If your software is bought by a million people, and they can complete 500 transactions a day, your one second reduction of efficiency is costing the consumer 500000000 seconds per day…which is 8,333,333 minutes or 138,888 hours. If the average wage of those users is ten dollars an hour, your one second in efficiency now has cost 1.3million dollars per day.

Not even a Lego Calculator could make that discussion cool

With guilt trip thusly set to “argh”, I focused my efforts on UI design and making things work efficiently. Even now, I can remember the tab order of one of my first CRM’s I worked on…because it was out of order.

The stakes have changed since I was taking Visual Basic. I (we) support sales, and lost productivity is not simply about lost time, but about what your sales teams COULD have been doing. The math is pretty easy…and pretty scary:

Time spent clicking / scrolling / using salesforce in an inefficient manner

X by Number of times

X by Number of Users

X by days in year

= Time wasted = Money Lost = No free coffee

For the sake of this blog post, I am going to clean up the contact layout. I have sat with my users and estimated that they waste about 2 seconds every time they hit the layout  because of a section that Marketing has requested. This section consists of four check boxes, three text boxes and one URL field in a two column layout. This section was created for marketing and was placed near to the top of the layout in return for the data not being required. This section pushed a much more used section down below the scroll line (IE, users would have to scroll to see it). Marketing has given the OK on making this section not visible as long as there is some visual refernce to these fields still on the page layout.

A user will typically hit the contact layout 25 times per day and I have 25 users. If I can compact the layout, I should be able to reduce scroll time by about half, which should save about 45 (sales) hours per year. Notice, I didn’t just say hours, I said sales hours. Sure, saving 45 regular hours might not be much in the whole scheme of things, but sales hours is like a force multiplier. If you enabled your sales teams to have even a few more minutes per week, they can make a few more calls, make a few more emails, make a few more dollars.

Take a minute to enjoy this worn out cat.

Phew

I am beat just writing about this!

I am going to break this whole thing out into three distinct chunks:

1)      Create the Summarizing Formulas (In this blog)

2)      Create the Visual Prompts (Next Blog)

3)      Make Data Entry awesome with Flows (Next Next Blog)

Summarizing Formulas

Personally, I tend to write smaller, nested formulas that analyze bits and pieces of data. This makes it a bit easier (in my opinion) to write that final formula that presents the results to the user. While you could probably write this all in one huge formula, for the sake of troubleshooting and scalability, I am going to create the following fields:

1)      Create a formula to look at the 3 text fields (Return Type is Text)

Text(

if(len(Test_Text_1__c)>0,1,0)+

if(len(Test_Text_2__c)>0,1,0)+

if(len(Test_Text_3__c)>0,1,0))&” out of 3 populated; ”

Text Box Formula

2)      Create a formula to look at the URL field (Return Type is Text)

if(len(Test_URL__c)>0,”URL Present”,”URL Not Present”)

URL Formula

3)      Create a formula to look at the check box fields (Return Type is Text)

Text(

if(Example_Check_Box1__c=TRUE,1,0)+

if(Example_Check_Box_2__c=TRUE,1,0)+

if(Example_Check_Box_3__c=TRUE,1,0)+

if(Example_Check_Box_4__c=TRUE,1,0))&” out of 4 set to True; “Check Box Formula

4)      Create a formula to aggregate the above

Check_Example_CheckBox__c &” “& Check_Test_Text__c &” “& Check_Test_URL__cAggregate Formula

The net result is a field that will present the user with data facts not data entry points. Aside from having a cleaner layout, I a firm believer that if presented with text, most humans brains at least acknowlege that text before moving on. By reducing the clutter, you are making your overall page layout less fatiguing.

End Result

Individual Results

In the next post, I am going to discuss how we are going to visually prompt the user to give us data, but until then consider the other benefits of this type of functionality:

1) You could use these fields in reports to give better summaries

2) You could write validation rules off of these formulas rather than the individual fields

3) You could write workflows off of these formulas

See you all next week, same BatTime, same BatChannel where I will show you all how to kick it up a notch and grab your users attention!

Kick it up a notch

You totally thought I was doing Batman pic, weren’t you?

Andrew

What (approximately) 48 hours with Apex has taught me

Standard

Friday afternoon, around 2:00 I got a message telling me to check out SFDC99.com. At first, I was skeptical, here is yet another blog that is going to teach me Apex / java/ html etc…I had read it all before and have failed just about every time. Part of it was how the knowledge was presented, part of it was me saying “It is 20XX, why am I still having to write lines of code” and part of it was that I can do a BUNCH of cool stuff already with the goodies in Salesforce, what will learning Apex do for me.

Apparently, not my future.

Where we are going, we don’t need code

This blog was different though, the tutorials were written in a conversational and logical manner that made sense and also didn’t come across as a developer talking to a kindergarten class.It also dawned on me…I was doing this stuff already. Sure, it might be through flows or crazy clever formulas and workflows, but the logic was there. My bias was pretty much erased completely once I saw this question:

1. If you can solve a business need using either a workflow or a trigger, which should you use?

Always use a point-and-click solution (workflow) when possible!

  • It’s easier for your team to create and maintain workflows
  • Workflows are easier to find when debugging unexpected behavior in your org
  • Workflows never break!
  • You don’t have to write test classes
Pretty much every developer I have ever worked with

In internet time, this meme is so old it farts dust

The reason this question really hit me was because I have ran into MANY developers that are code first, ask questions (and write documentation, test, get feedback on, deploy correctly) later.

Having seen and supported the aftermath of this type of developement, I really took a to the whole #ClicksNotCode and #ButtonClickAdmin philosophy to heart. Seeing a developer actually answer this question like I would was like a golden ticket.

Golden Ticket of Apex

First time your class runs with 100% coverage (even though trigger is 5 lines)

It told me I could still believe in all the good stuff that makes a system like Salesforce.com great WHILE learning the dark side.

So, it has been approximately 48 hours since I started doing this thing, and here is what I have learned:

1)      Just because you know code doesn’t mean you know salesforce.

2)      APEX is way more intuitive than whatever code you might have tried to stumble through last time.

3)      I am really thankful for my time supporting traditional CRM systems (Cough, Siebel, Cough) and having to muddle through gnarly SQL statements.

4)      Having to have 75% code coverage is tough, but if you think about what you are trying to do with your trigger and then build out from there, you will do good.

5)      Try and think how you would write a trigger to handle every transactions like getting coffee.

Next steps? Well, I just got my Head First Java book and have been working through that. Honestly, so far installing the JAVA SDK seems to be the hardest part (and I have installed Linux!), but that really isn’t a surprise since it is an Oracle Product.

Clicks not Code Larry, Clicks not Code

The new westcoast beef

I am also going to keep plugging away on the SFDC99.com tutorials. I have went through Chapter4 and am going to spend some time here getting a better grip on the basics before I move along. I am also going to keep “doing what I do” in terms of new functionality in SFDC. I love all the fun stuff like flows and workflows, but much like a padawan with a new lightsaber, I am going to try and use it as much as I can.

Nuts! My lightsaber test class only ran 45% of the lines!

I missed class picture day


Andrew

Fun with Salesforce Flows – Parsing Multi Select Picklist fields

Standard

Fun with Flows – Parsing Data

I recently ran into a challenge while making / scripting / conjuring a fairly complex flow. I needed to get data out of a Multi Select Picklist (MSP) field for use later on in my flow. The google hive brain did not help at all…literally, I couldn’t find anything when googling on terms such as “salesforce visual flow parse”. Once I started googling ““salesforce parse” I got lots of results…for apex solutions.

So once again, I find myself faced with the following:

1)      Check my “Clicks Not Code” membership at the door and start down the apex path?

2)      Write some crazy formula field to do this work and then pass data back and forth?

3)      Put on my thinking cap and figure out a way to get this done with in a flow?

And as usual, I opt for #3.

First things first, I had to figure out what I had to work with. To do this, I extracted some data from my MSP fields and found that MSP’s store their data in a very logical way, ((“Value””SemiColon”)). What this means to me is that when I run the query on the object and push MSP field data to a variable, it is going to ONLY bring over the data that has been selected and it was going to show up as a text string. I had a hunch that the MSP would act this, but you know what they say, “Trust but verify”. This behavior also reinforced why I wanted to parse the data. Carrying around a full string like “Value 1; Value 2; Value 3” really reduces what you can do within flows.

Now that I know what I am working with, I can go about getting the data into the format I want. The quick synopsis is that I am going to:

1)      Create variable for the MSP Values

2)      Create decisions for each MSP Value

3)      String the decisions together

For this example, I have the MSP field “McDuck” that contains the values Huey, Louie, Dewey, Donald, Daisey and Scrooge. I want to separate out any selection into their own variable for use in other parts of my flow. Here are the steps I am going to run through (Visual in the PDF).

1)      Query “GetData” passes the values in the field “McDuck” to “varGotMcDuckData”

Image

2)      The data in “varGotMcDuckData” is then ran through a number of decision setps.

     ParseHuey takes a look at “varGotMcDuckData” and if the data in that variable contains “Huey”, then populates “VarHuey” with “Huey”

Image

      ParseDewey takes a look at “varGotMcDuckData” and if the data in that variable contains “Dewey”, then populates “VarDewey” with “Dewey”

Image

3) Rinse, wash, repeat as needed!

There are a couple things important to keep in mind when doing this. The first is that these can get really big really quick. Don’t be afraid to use a subflow to do the dirty work (Future Topic!). Also keep in mind that once data gets passed into a variable, data is retained there until the flow stops. If you are going to have a multi-step process you need to build in a clean step where the variables are scrubbed of data.

Even though this is a fairly elaborate process, it really does go by quickly. The added benefit is that flows are recyclable, so if I ever had a need to parse out the McDucks in a flow anywhere, I could reference my parsing flows over and over and over again.


Andrew